Wednesday, January 29, 2014

Pregnancy Yoga

Almost every Wednesday I have a doctor's appointment in the morning.  Since I don't have time to go to the gym on my appointment days I have been doing a Pregnancy Yoga to switch it up! There are many benefits to doing yoga while pregnant:

1) Develops Stamina & Strength
2) Balance
3) Relieves tension in lower back, hips, chest, upper back, neck and shoulders
4) Calms the nervous system
5) Preparation for labor
6) Connection with baby
7) Increase Circulation
8) Breath work practice
9) Nurturing Time

I found a few Pregnancy yoga videos on youtube that I really like for different parts of your pregnancy that are each only 10 minutes:

Yoga series - 10 min each
1) http://www.youtube.com/watch?v=B87FpWtkIKA SITTING - all trimesters 
2) http://www.youtube.com/watch?v=nxrT_DgEroQ STANDING - 2nd trimester 
3) http://www.youtube.com/watch?v=vtRbjWujur8 CHAIR - 3rd trimester
4) http://www.youtube.com/watch?v=HrO1dRBX7m4 Hands and knees - All trimesters

Friday, January 24, 2014

Cake Pops

Due to the popular demand, I am writing a post on how to make cake pops!!!  My baby shower was the second time  I made cake pops (Thank you Heather for helping me make them to such perfection)...the first time I attempted to make them was for Andrew's birthday a few years ago (they fell off the sticks, the chocolate was chunky, but they did taste good).  This recipe below is the correct way to make them so I hope you don't have to have the same first cake pop experience I did :)

CAKE POPS


What you need:
1 box of cake mix - any flavor will work
1 can of frosting (you can use any flavor, just dont get the "whipped" kind)
1 package of Candi Quick 
1 bag Candy Melts
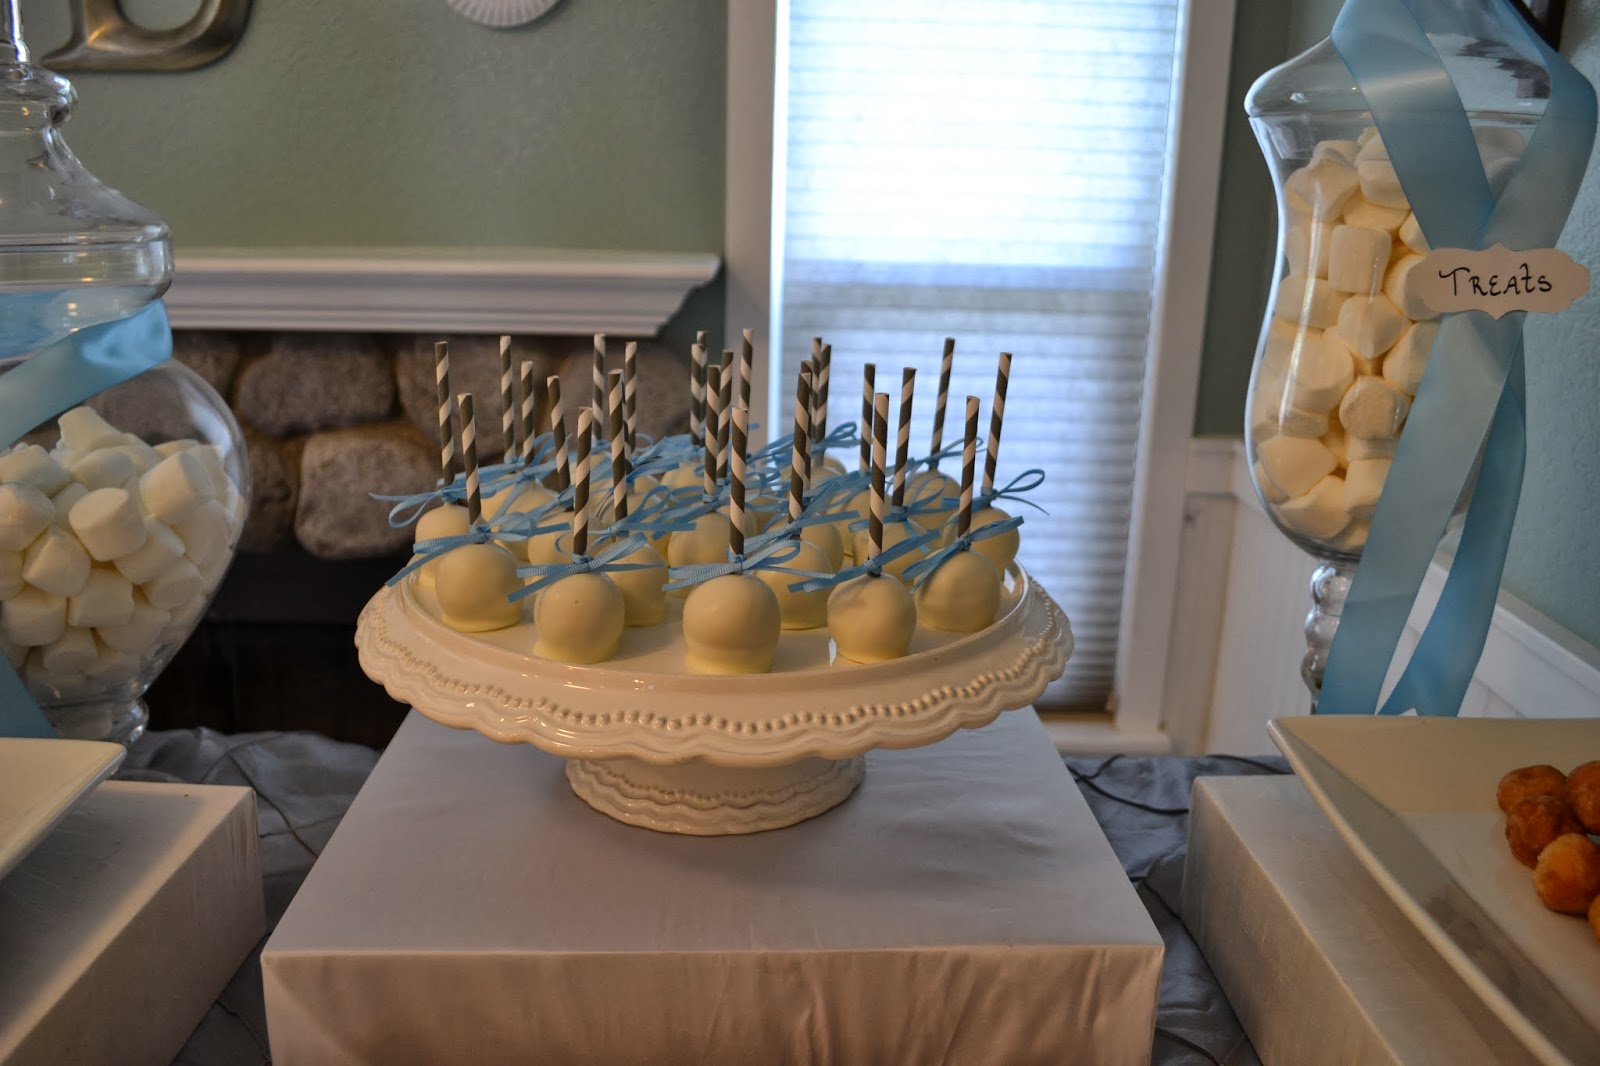
Lollipop Sticks or Paper Straws
Cookie Scooper
2 Cookie Sheets
Parchment Paper

Directions:
Make the cake according to the directions on the box the day before you plan to assemble the cake pops.  This allows for it to cool properly.  The next day cut around the edges of the cake so that you don't include any of the crusty edges in the mixture. Cut the cake into 4 sections and begin to crumble the cake into a large mixing bowl until all the cake is crumbled to a fine consistency.  

Next, add in half (ONLY HALF) of the frosting to the cake crumbles. Start mixing with your hands really well until it is well combined.  Then take a cookie scoop and start scooping and rolling your balls of cake. Roll, roll, roll! Make sure the cake balls are really smooth! Place them on a cookie sheet lined with parchment paper.  Place in the refrigerator for 20 minutes.  This helps firm the cake balls up so they do not fall off the stick when dipping. While they are in the fridge, on a separate cookie sheet that is also lined with parchment paper, lay out Candy Melts (flat side down) about 2 inches apart from each other.  

When they only have a few minutes left in the fridge, beginning to melt the Candi Quick in a deep bowl. Melt per the directions on the package (1 minute then stir, then 30 second intervals stirring in between) until melted.  Have everything handy (Sticks, Candy Melts, melted Candi Quick, Cake Balls). Take a stick and dip the tip into the melted chocolate. Insert the stick into a cake ball to about the center. Next, dip the cake ball on the stick into the melted Candi Quick. The quicker you are in then out the better. Angle the cake pop and twirl to get as much excess chocolate off as possible. Place the cake pop on top of Candy Melt.  If you want to make the cake pops with the cake pop up place into a Styrofoam block to dry.  If you want to add any sprinkles or anything you must do it while the cake pop is still wet so that they have something to stick onto.  

To store:
DO NOT PUT IN FRIDGE! This will make them have condensation with you take out. Just leave on cookie sheet and cover with tin foil.
You can make these up to 4-5 days before the event if you need.

ENJOY!!!! :)

Wednesday, January 22, 2014

Baby Shower

This past weekend I had my Baby Shower! It was totally perfect and everything I could have asked for.  Thank you to everyone who helped me make this day so very special, all that who traveled so far to be here to celebrate with me, and thank you everyone for all the fun baby goodies :)


Tuesday, January 7, 2014

Our New Home - Starting February 1st

We love the current town home we live in and have been planning on living there for at least another year. We were surprised last Friday when we received a letter notifying us that the owners of our rental have to sell it and will be listing in on the market within the next 6 months....lucky us our baby is due in 2 months.  Soooo we are going to move before little baby boll is arriving so we will be a little more settled. 

Beginning February 1st we will be calling this our new home :)


Wednesday, January 1, 2014

DIY Nursery Mobile

I went to Paper Source and bought 4 packs of their cover weight paper.  The white is for the cloud at the top and the 3 blue shades are for the rain drops. Then you'll need a needle, thread to match the paper, monofilament string and a hook for the ceiling.

Then I found a large cloud template and rain drop templates online.  You'll need 2 print outs of the cloud so that you can make it 2 dimensional and about 36 rain drops since you will also be making those 2 dimensional.

Cut out all the cloud templates and the rain drop templates. Place the 2 clouds on top of each other and fold in half. Then sew up the center.  For the raindrops place 2 of the same color rain drop on top of each other and sew up the middle the same way.  Once the raindrops were sewn together I ended up only making 12 finished rain drops of each color.

From there I poked two holes on each half of the clouds, these are the holes that I will later hang my rain drop strings from.  To connect the rain drops I cut pieces of the monofilament string about 6-7in and tied them together by placing the string through the sewn up center of the rain drop.

Here is the finished mobile!!!!! I am pretty impressed....Etsy you have some competition!